
Experiences: Using the Sony DSC-P1
by Thomas Shieh / updated July 2001

The Sony
DSC-P1 is a compact digital camera first introduced in September,
2000.
Functionally, it was designed as a point-and-shoot camera, but I have
found it to be more of a challenge than I originally expected.
I hope you will find my notes here useful in some way.
Thanks to David Treidel for revising this article.
MY
P1 GALLERY | GLOSSARY
|
COMMENTS
Contents
TUNING
EXPOSURE | DAYLIGHT
| LOW-LIGHT
| SLAVE
FLASH
NIGHT
SHOTS | MACRO
| DEPTH
OF FIELD | WHITE
BALANCE
EXIF
INFO | PROBLEMS
Tools
- EXIF
viewing program: There is extended
information embedded in each image file straight out of the camera.
A viewing program is essential if you wish to understand the basics
of photography and how the camera implements its AE automatic exposure
modes by means of aperture, shutter speed and ISO setting etc.
Michal Kowalski has an excellent freeware program here.
- USB Drivers: Sony service page.
Tuning exposure
Even with a point-and-shoot camera like the P1, there are still various ways to manipulate the exposure settings. If you know your camera's behavior well enough, you can always "trick" the auto exposure to give you the settings that you need. Obviously not as handy as cameras with manual settings, but sufficient in most situations.
- TIP:
Too
dark? Too Bright? Use EV compensation.
Cameras are not as smart as you think. Most cameras expect correctly exposed pictures to come out as "gray" pictures (18% reflective). This means that if you try to shoot a white wall, the camera will give you a "gray" wall instead. We call this underexposure. On the other hand, overexposure will easily happen when you fill up the frame with the close-up of a pinecone. Use EV compensation to get the correct exposure brightness when your subject is brighter or darker than average.
Add EV to correctly expose white objects and subtract EV to get good pictures of dark objects.
- TIP:
How can half pressing the shutter
release help?
Half pressing the shutter release button and holding it locks focus and exposure readings at whatever you aim the camera at. This does not necessary have to be your final subject, as long as it gives a desirable exposure brightness and focus distance. Recompose the picture while keeping the shutter release button half-pressed. This is very useful in handling difficult lighting situations or hard to focus subjects.
- EXAMPLE:
you can trick the camera to brighten(darken)
your actual subject by half pressing the shutter release at a darker(brighter)
object. This substitute object should have approximately same distance.
I always use this as a shortcut for EV adjustment.
- EXAMPLE: if you think the camera is having a hard time focusing on your subject or you cannot be sure where the focus point is going to be, you can try letting the camera focus upon a larger target with similar distance. Remember the difference in light condition may have to be compensated for with EV.

Daylight
This applies to situations with sufficient light strength.
Situation:
backlight
If the background is much brighter than your
subject (closer to the camera), or when strong lighting make shadows too
contrasty. The two basic methods to handle this is spot metering or flash
fill-in.
- Spot
metering
Switch to spot-metering AE mode and meter the correct exposure for the subject by half-pressing the shutter while centering your subject. Disadvantage: the highlights overexposes and loses detail. -
Flash fill-in
The flash can be used to compensate for too much contrast between highlights and shadowed areas. Switch the flash to force-on mode (flash strength may need adjusting). Don't use spot-metering mode, use normal metering to get an overall light reading and subject focus. You should now see the background correctly and your subject too dark on the LCD preview. Subtract EV if the background seems too bright. The flash will provide the extra light for your subject, and you will have the background and your subject correctly exposed at the same time.
This is a relatively difficult situation for the auto-focus system, so make sure you always confirm focus. Or try to focus on the ground in front of the subject to get a similar distance reading.
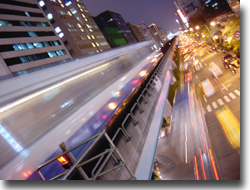
Low-light
Challenge:
How
good is your grip on the camera?
Put it to the limit !
You might get some surprisingly good pictures.
For slow subjects:
-
twilight+
handheld
Suitable for "brighter than average" low-light. Needs practice for a firm grip and a good habit of shooting spare shots. No zoom please.
- twilight+ with tripod or firm support
For well planned low-light shots. Self timer necessary to minimize vibration. Provides best quality possible with no range or zoom limits, but not suitable for moving objects.
-
For using twilight+ with average indoor
lighting, I recommend using a EV compensation setting of +0.7EV
For quick shots within 7 feet :
- In-camera
flash
Keep in range & don't use zoom. Out of range objects will appear dark and blurry.
Quality flash:
- Slave
flash
More flash distance and natural looks. That means better photos of your kids and pets. However, you will have to carry an extra flash.
Twilight
plus mode
This is the AE mode having an icon of a crescent moon with a "+". Many
people overlook this mode for indoor shots and choose to use the auto
flash instead. This is a pity, since this mode can bring out some very
nice and natural looking pictures. If neither you or the contents of your
picture are in a hurry, why not give it a try?
Try putting your camera on a desk or a tripod, and set the auto-timer
to minimize the vibrations brought about by pressing the shutter release
button. Practicing a firm grip and shooting some spare shots will help
enormously if you want to try out twilight+ without a tripod.
- advantage
Has fixed ISO 100 for low-noise. No distance limit. - disadvantage
The camera becomes shake vulnerable and needs good support. If your subject is something that moves fast, the image will suffer from motion blur.
In-camera
flash
Two rules of caution: 1. Try not to zoom.
2. Stay in range
The
P1's in-camera flash provides only 7 feet range when not using the zoom,
and 4 feet when zoom is on its tele side.
I am not a big fan of using in-camera flash indoors, since it looks quite
unnatural and the background often disappears in darkness.
Slave
flash
This is a very useful accessory that
will cost you around 100USD. A sure choice for anyone who wishes to have
better quality indoor pictures. Check out my notes on this topic HERE.
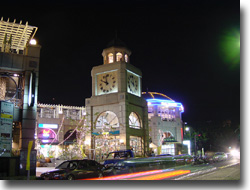
Night photography
The basic configuration for this is twilight plus with self timer and tripod.
TIPS: Always confirm your focus. Experiment with EV adjustment.
White balance
I use the auto white balance setting for the majority of my shots. But sometimes the hold function comes in handy....read on.
Fluorescent lighting
The
auto white balance setting is not always accurate with common fluorescent
lighting. For instance, lights in my office sometimes give out pictures
with a yellow-greenish cast.
Oddly, what you point at when you turn on the camera actually seems to
make a difference! Even though the
camera is supposed to continuously adjust its white balance, in my experiments,
where I started out actually limited the final results. Here is a quite
strange method that worked to correct the white balance for me under less
severe conditions, you may want to experiment with it.
Under fluorescent lighting:
1. Switch to auto white balance.
2. Turn the camera off and on while pointing to different corners of the room each time. If you find a better white balance, switch white balance to "hold" immediately.
3. Finish shooting and switch back to auto for other light conditions.
As a result, I found a "favorite" corner of my office where I can get correct white balance everytime I turn on the camera in that direction.
Depth of field
shallow
DOF effect
With
most consumer digicams today, it is hard to have shallow depth of field
effects that can blur the background and emphasize your subject
in focus. With the P1, zooming doesn't seem to help much since max aperture
decreases as you zoom, so get close as you can to the subject, and use
macro for best results.
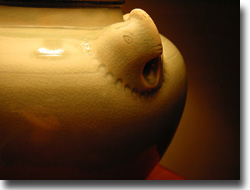
Macro
P1's macro magnification
can be increased by means of an additional magnifier.
Ray Albrektson has made a brilliant demonstration HERE.
A microscope version by Daniel Rutter
HERE. Check them out.
Exposure basics - reading the EXIF information
This is the compilation of extended data extracted from my photos.
| AE mode | Aperture | Shutter speed | ISO |
| Normal flash off | full range | 1/2000~1/15sec | 100~282 |
| Normal flash on | full range | 1/2000~1/60sec | 100~135 |
| Spot metering flash off | full range | 1/2000~1/15sec | 100~282 |
| Spot metering flash on | full range | 1/2000~1/60sec | 100~135 |
| Twilight flash off | maximum | 1/500~1/30sec | 100~141/200* |
| Twilight flash on | maximum | 1/500~1/30sec | fixed 100 |
| Twilight plus flash off | maximum | 1/500~2sec | fixed 100 |
| Twilight plus flash on | maximum | 1/500~2sec | fixed 100 |
| Landscape flash off | full range | 1/2000~1/30sec | 100~282 |
| Landscape flash on | full range | 1/2000~1/30sec | 100~135 |
| Pan-focus flash off | fixed F5.6 | 1/1000~1/30sec | 100~282 |
| Pan-focus flash on | fixed F5.6 | 1/1000~1/30sec | 100~135 |
* depends on zoom (ISO 141 on W side / ISO
200 on T side)
You might want to study the readings from the EXIF viewing program and find out how the brightness, noise level and sharpness of your pictures is related to these factors.
Aperture : maximum aperture lets more light in and makes depth of field shallow(not obvious with P1).
Shutter speed
: Slower shutter speed amounts to more light. Even with no zoom,
hand-holding the camera for exposures longer than a shutter speed of under
**1/30~1/10sec will easily blur the image due to camera shake. Zooming
in demands even higher shutter speeds for a sharp image.
** the lower bound on acceptable shutter speed depends on how good
your grip is.
ISO
: Higher ISO suffers
from more noise.
Problems
BLUR - Why?
- Bad
focus - the number one factor:
Precisely center the subject before focusing. The focusing area is a quite small area surrounding the center of the frame. Like many digital cameras, contrast comparison is used, and contrasty vertical lines are needed in order to help focus.
Try this to help focusing:
Center your subject in the frame.
Always half-press shutter release first and wait for the green focus light to light up steadily. If it does not stop blinking, try again. Keep it held down while you recompose the picture and give it the final press.
Rotate the frame to help focus on vertical lines.
Find a better lit or more contrasty object around with similar distance.
Zooming in might help. After you have made focus, zoom out to recompose while keeping the shutter release pressed halfway.
Switch on macro when distance drops below 50cm(~20").
Example: On a dark street, zoom in on a bright window. Focus may not be accurate after zoom has changed, but better than no focus at all.
Additional reading: how auto-focus works
-
Camera shake:
The image is not dark, but overall blurred. Avoid the zoom to get faster shutter speeds. Use a tripod or other forms of camera support. Or follow some general firm grip tips: Brace the camera close to your body or find something to lean on. Hold your breath. Squeeze the button gently. Release the button only after the exposure is finished.
- Subject
motion blur:
Shutter speed is low and your subject is moving. Sometimes you need it on purpose, sometimes it ruins the picture. If this is not what you want, flash can help freeze the motion. Otherwise, to increase shutter speed you will need other sources of bright lighting.
- Insufficient
exposure:
this is typically seen in corners of the picture where P1's weak flash may fail to illuminate. You may want to try getting within flash range or use twilight+ mode.
NOISE
Switch to twilight+. It has fixed ISO 100 which reduces the noise.
IMAGE LOOKS DIFFERENT ON THE MONITOR
Moniter calibration is needed when your
moniter shows image (brightness / color) different from the one on the
camera LCD. It is also important that you correctly perform moniter calibration
before image post-processing, printing or webpage publishing.
DPreview's retouching forum
Thomas
Niemann's calibration guide
Rare problems
- Twilight+
whiteout:
If you are using twilight+ mode, don't half press the shutter release too fast. The camera needs ~1 sec to adjust to a new lighting condition before you can start half pressing the shutter release. Quickly moving your aim from a darker scene to a brighter one might give you some unexpected 2 sec washed-out exposures, if you half-press the shutter release really fast right after motion.
Miscellaneous
- Fast image review
Keep the shutter release button held down after you finish shooting the picture, wait for the camera to store the image, and then you will be shown your last shot, before the button is released.
- Fast focusing / pan-focus mode
The fastest focusing mode you will find on the P1 is the pan-focus mode. Why? In this mode, the camera does not try to focus at all. A maximum range of distance is always sharp, like a basic point-and-shoot camera. Use this mode when you want both the subject and background to be clear at the same time. You cannot use zoom or get too close to your subject, and plenty of light is needed.
- Memory and batteries
Currently I have three memory sticks (128mb+2*64mb) in my camera case and an extra battery. Enough for a weekend at the beach.
- Spot
metering
This mode decreases the area of light metering. The camera will evaluate the light condition at the center of the frame. It does not directly affect the focus area (it's still a small area at the center). However, the difference in light metering might brighten the image somewhat (for instance, a backlight situation) and help the camera in capturing contrast, indirectly helping focus.
Digital Photography Glossary
aperture:
Directly
related to the instant amount of light reaching the CCD. Bigger aperture
(smaller F-numbers) means letting more light in. Maximum aperture with
the P1 at wide zoom is F2.8.
shutter
speed:
The time length of the exposure. Along with
aperture, these two major factors decide the total amount of light exposure
for one individual image.
EV adjustment/compensation :
an adjustable setting on the camera to directly
manipulate the final exposure of the camera. For instance, +1.0EV is equivalent
to doubling the exposure time(aperture fixed) or letting twice as much
light in.
how
zoom effects aperture and shutter speed:
Zooming in with most camera lens makes the maximum aperture grow smaller,
which means letting less light in. For scenes with average lighting, exposure
time will become longer. This difference in exposure time in turn leads
to more blurry shots in low-light conditions.
depth of field:
a variable range of distance surrounding the sharpest focus point, in
which objects within are considered to be acceptably sharp.
AE
modes:
Automatic Exposure modes represent different
"behaviors" of the camera which might give out different ISO,
aperture and shutter settings under identical light conditions. These
factors have direct impact on the image. While color, sharpness, contrast
are not directly effected by these modes.
under(over)exposure:
final image seems darker(brighter) than it
is in real life.
Accessories
Memory and batteries
Take advantage of reusable digital storage.
Getting enough memory means shooting all the pictures you want, over and
over again!
I recommend packing at least 128mb and an extra battery for a weekend
at the beach.
what I have to say about..
I haven't quite figured this one out yet.
If you are new at photography, you may want to know more about the basics. Check out the many excellent photography tutorials on the web, and go through the list of basic photography terms first. Surf the sample forums and photo contest websites to see what other peoples work look like.
Three guidelines of my own:
- Simplify the elements in a picture. Concentrate by isolating the topic.
- Photography is essentially the recording of light. Good lighting can enhance color, contrast and texture to create different moods.
- Experiment constantly and try out everything. This is a craft that relies greatly upon experience.
Afterthoughts
I believe small cameras provided with large storage devices can gradually change the way we record our lives today. In the future, we will be able to record everything we see to our heart's content with more compact devices and near-infinite storage capacity.
Today, I tend to use my digital camera much more than my other SLR film cameras (Canon EOS5 and A1), even though they are more capable in many ways. In the long run, portability and reusable storage media seem to be the more benefiting factors by giving me extra opportunities to experiment and capture at the right moments.
FEEDBACK
Suggestions?
Please send me any of your valuable comments to help me improve or let
me know if this page has helped you in any way. Thanks in advance!
Click
here to send Thomas a message.